Quick & Easy Cheese Boards: Perfect for Any Occasion
In the culinary world, few things offer the blend of versatility, elegance, and sheer deliciousness quite like a well-crafted cheese board. Whether you're hosting a grand dinner party, an intimate happy hour, or simply pulling together a no-fuss weeknight meal for the family, knowing how to make a cheese board can elevate any occasion. Forget the notion that they need to be elaborate or expensive; the beauty of a cheese board lies in its adaptability and the joy of using what you already have on hand.
From a spontaneous late-night snack to an impressive appetizer for twenty, cheese boards are a go-to choice for countless reasons. They offer something for everyone, look incredibly festive, and – perhaps best of all – require no actual cooking! This guide will walk you through the simple steps to assemble a gorgeous, inviting cheese board without breaking the bank or spending hours in the kitchen. Get ready to transform everyday ingredients into an extraordinary spread.
The Allure of the Accessible: Why Cheese Boards Are Your Go-To
Many shy away from creating a cheese board, imagining it to be a complex culinary feat reserved for seasoned hosts. However, the reality is far simpler. The secret to a truly great board isn't about sourcing obscure ingredients or possessing professional plating skills; it's about abundance and thoughtful presentation. When you understand how to make a cheese board, you unlock a universe of quick, customizable, and budget-friendly meal solutions.
- Unmatched Versatility: A cheese board can effortlessly morph to suit any time of day or event. A simple arrangement of sliced cheddar, deli meat, and crackers becomes a satisfying "snack lunch" for kids, while a more varied selection of cheeses, charcuterie, and artisanal accompaniments shines as a sophisticated party appetizer.
- Effortless Elegance: There's an inherent charm in a spread that invites grazing and discovery. The act of piling various textures, colors, and flavors onto a single surface creates an appealing visual feast that feels luxurious without demanding much effort from the host.
- No Cooking Required: This is a major win! For those times when you want to entertain or provide a substantial snack without turning on the oven, a cheese board is your best friend. It’s all about assembly and arrangement.
- Caters to All Tastes: With a diverse selection of items, you can easily accommodate different preferences, dietary needs, and appetites. From savory to sweet, crunchy to creamy, there's always something for everyone to enjoy.
The core philosophy is simple: use what you have. A quick pantry raid and a peek in the fridge are often all it takes to gather the components for a delightful board that can be assembled in as little as five minutes.
Building Your Board: The Essential Components and How to Choose Them
Mastering how to make a cheese board begins with selecting your foundational elements. Think of your board as a canvas, and each ingredient as a stroke of flavor and texture. For an impressive spread that truly offers something for everyone, aim for variety.
1. The Cheeses: The Star of the Show
When building a board for 5-6 people, aim for at least three distinct varieties of cheese. This allows for a delightful exploration of flavors and textures. The ideal trio often includes:
- Mild & Creamy: A soft, approachable cheese like Brie, fresh mozzarella, or a mild goat cheese. These are usually crowd-pleasers.
- Medium & Firm: A versatile option with a bit more character. Think a sharp cheddar (like the Unexpected Cheddar from Trader Joe's or Cabot's Everything Cheddar), Gruyere, or a robust Swiss.
- Bold & Funky: For the adventurous palate, include a stronger, more pungent cheese. Blue cheese, Stilton, Humboldt Fog, or an aged goat cheese can add an exciting dimension. Consider seasonal favorites too, like a cranberry goat cheese during the holidays.
Pro Tip: Remove cheeses from the refrigerator about 30 minutes before serving. This allows them to come to room temperature, enhancing their flavor and texture significantly.
2. The Meats: Savory Companions
While optional, meats add a wonderful savory counterpoint to the cheeses. You don't need fancy charcuterie to make an impact. For an everyday board, sliced deli meats (turkey, ham, salami) folded into appealing piles work perfectly. For a more sophisticated touch, consider:
- Cured Meats: Prosciutto, salami (genoa, soppressata), or pepperoni.
- Pâtés: A small dish of pâté can add a rich, spreadable option.
Arrange meats in different ways – fanned, folded, or loosely piled – to add visual interest.
3. The Crunch: Crackers, Breads, and Crisps
These are essential vehicles for your cheeses and spreads. Offer a variety of textures and flavors to complement different items on your board.
- Plain Crackers: Water crackers or simple butter crackers provide a neutral base.
- Flavored Crackers: Herb, whole wheat, or seeded crackers add extra taste.
- Crusty Bread: Sliced baguette or artisanal bread can be a hearty option.
- Pretzels: Peanut butter-filled pretzels from your pantry are a surprisingly popular addition, offering both crunch and a touch of salt and sweetness.
Don't be afraid to mix and match leftover bits from various cracker boxes – it adds to the eclectic charm!
The Supporting Cast: Fruits, Nuts, Spreads, and More
Once you have your cheeses, meats, and crackers laid out, it's time to fill in the gaps with delightful accompaniments. These elements add color, freshness, sweetness, and acidity, balancing the richness of the main ingredients.
1. Fresh Fruits & Vegetables
Seasonal fresh produce is a must. They add vibrant color and refreshing flavors.
- Fruits: Grapes (especially colorful varieties), berries (strawberries, blueberries, raspberries), apple or pear slices (toss with lemon juice to prevent browning), figs, or orange segments.
- Vegetables: Cucumber slices, carrot sticks, bell pepper strips, cherry tomatoes, or radishes.
2. Dried Fruits & Nuts
These provide contrasting textures and concentrated sweetness.
- Dried Fruits: Apricots, cranberries, dates, or cherries.
- Nuts: Almonds (especially sweet and spicy varieties), pecans (cinnamon roasted are a treat), walnuts, or cashews.
3. Spreads & Dips
Small bowls of spreads offer additional flavor pairings.
- Jams & Jellies: Fig jam, apricot preserves, or raspberry jam pair wonderfully with many cheeses.
- Honey: A drizzle of local honey, especially with blue cheese or goat cheese, is divine.
- Mustards: Dijon or whole-grain mustard can complement meats and stronger cheeses.
- Dips: Hummus or a creamy dip can broaden the appeal.
4. Briny Bites & Garnishes
Olives, pickles, and other briny items provide a piquant contrast.
- Olives: A mix of green and black olives.
- Pickles: Cornichons or pickled onions.
- Fresh Herbs: A sprig of rosemary or thyme can act as a beautiful, aromatic garnish.
The Grand Finale: Assembling Your Masterpiece (in Minutes!)
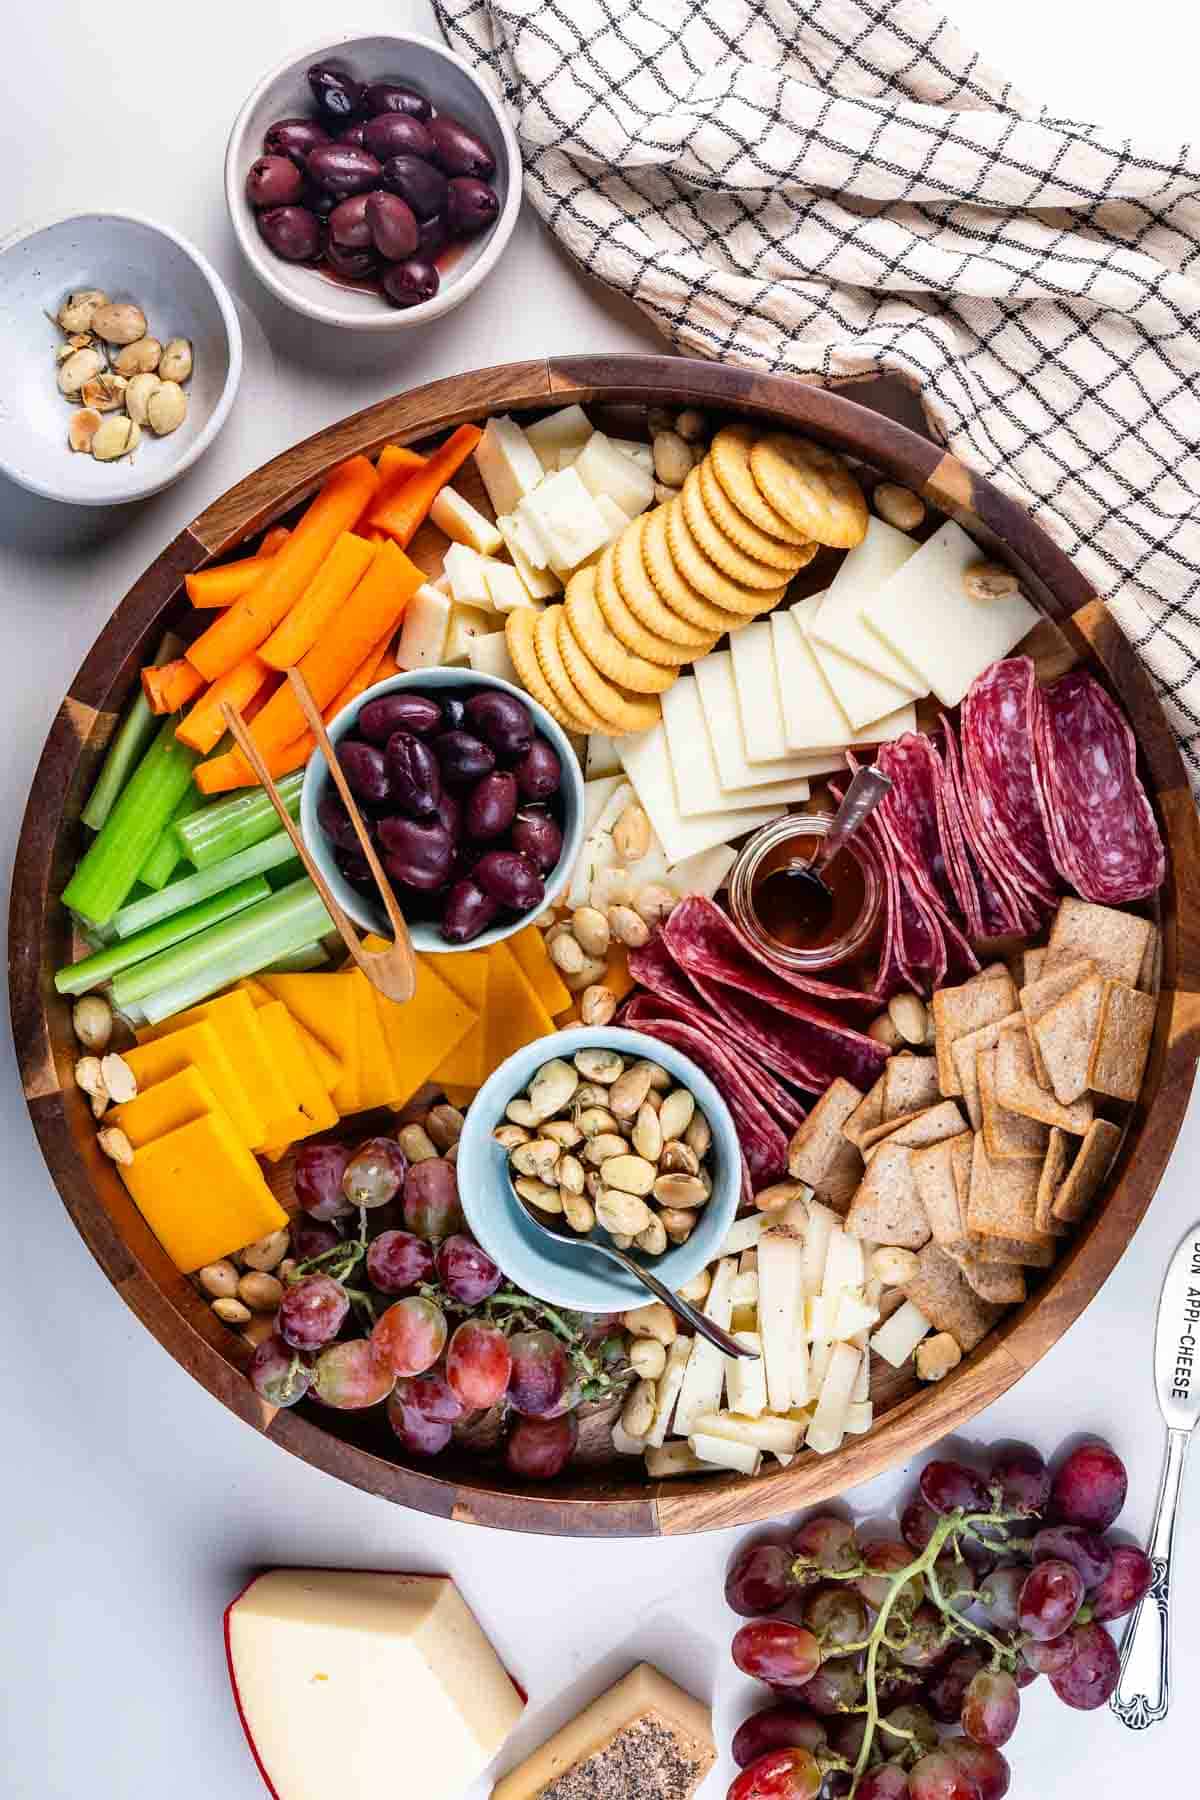
Now for the fun part: putting it all together! The absolute secret to a great board? Just pile it on there. Seriously, don't overthink it. The goal is an inviting, abundant look rather than a perfectly symmetrical arrangement.
- Start with Structure: Place your cheeses first, spacing them out across the board. If using small bowls for dips or olives, position those next.
- Add the Meats: Arrange your folded or fanned meats around the cheeses.
- Introduce the Carbs: Place piles of crackers and slices of bread strategically around the board, ensuring they're easily accessible to the cheeses and meats.
- Fill with Fruits & Nuts: Tuck fresh and dried fruits, along with nuts, into the empty spaces. Let grapes drape, create little clusters of berries, and scatter nuts generously.
- Drizzle and Garnish: Add any honey or jam to their respective bowls. Finish with a flourish of fresh herbs to add color and aroma.
The beauty of this method is that it naturally creates a visually rich and appealing spread. Don't worry about perfection; embrace the organic flow. You might be surprised at how quickly you can create a stunning board, often in 10 minutes or less, using mostly ingredients from your pantry and fridge. For more detailed tips on crafting your ideal spread, you can always refer to Cheese Board Making 101: Simple Steps for Stunning Spreads.
Remember, your cheese board can be as simple or as elaborate as you desire. For example, an everyday lunch board might feature a couple of deli meats, sliced cheddar, peanut butter pretzels, leftover crackers, and whatever fresh fruit or vegetables are in the house. It's about making the most of what you have, creating a delightful eating experience, and avoiding unnecessary stress. For those interested in maximizing impact while minimizing cost, consider exploring tips from Budget-Friendly Cheese Boards: Impress Without Breaking the Bank.
Conclusion
Learning how to make a cheese board is one of the most rewarding culinary skills you can acquire. It’s a testament to the idea that delicious, beautiful food doesn't have to be complicated or expensive. With a little creativity and a willingness to use what's available, you can assemble a quick, easy, and impressive spread perfect for any occasion – from a casual family meal to an elegant gathering. So go ahead, gather your ingredients, embrace the "pile it on" philosophy, and enjoy the art of the effortless cheese board!
