Crafting a visually stunning and delicious cheese board might seem like an art reserved for seasoned entertainers, but we're here to tell you it's much simpler than you think. Whether you're hosting a grand dinner party, a casual get-together, or simply indulging in a fancy snack for one, learning how to make a cheese board is a skill that will serve you well. Forget complex recipes and hours in the kitchen; a well-assembled cheese board offers a delightful array of flavors and textures with minimal effort. This guide will walk you through the simple steps to create stunning spreads, no matter your budget or time constraints.
The Unbeatable Charm of a Cheese Board
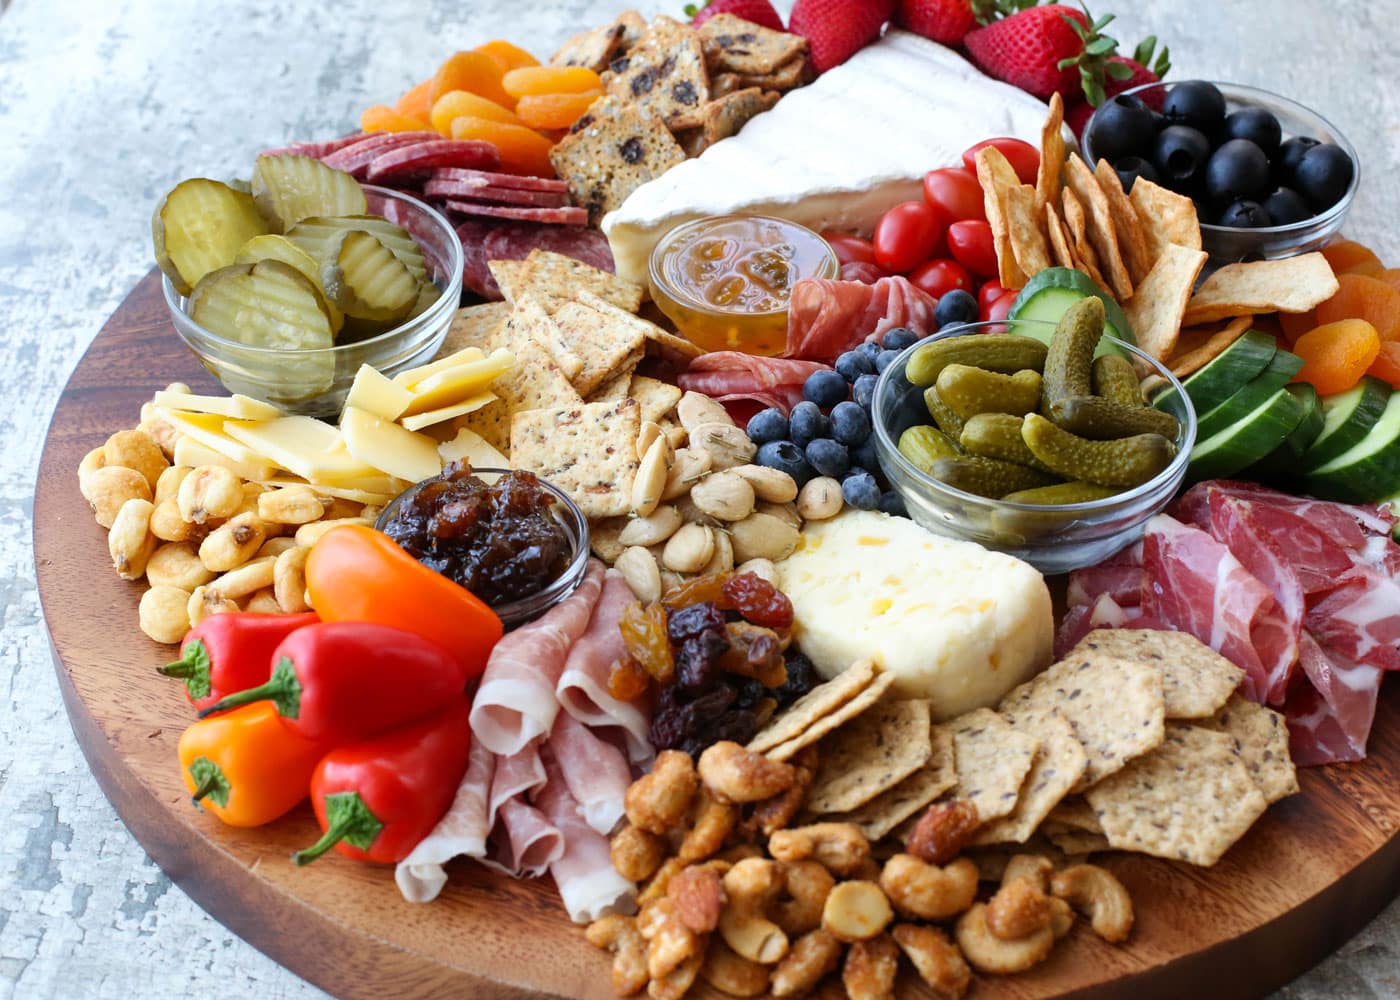
There’s a reason why cheese boards have become the undisputed champion of appetizers and light meals. They are incredibly versatile, beautiful to behold, and offer a little something for everyone. From the creamy delight of a soft brie to the sharp bite of aged cheddar, paired with savory meats, crunchy crackers, and fresh fruits, a cheese board is a culinary adventure on a single platter.
- Effortless Elegance: They look sophisticated and impressive, yet require no actual cooking. It's all about thoughtful selection and artful arrangement.
- Something for Everyone: With a diverse selection of ingredients, even the pickiest eaters can find something they love. This makes them ideal for mixed company or family gatherings.
- Highly Customizable: Cheese boards can be as simple or as elaborate as you desire. You can tailor them to any occasion, dietary preference, or even a specific theme.
- Budget-Friendly Potential: You don't need expensive gourmet ingredients to create a fantastic board. Often, the best boards are built from items already stashed in your pantry or refrigerator. For more ideas on how to achieve this, check out our guide on Budget-Friendly Cheese Boards: Impress Without Breaking the Bank.
Laying the Foundation: What You'll Need for Your Cheese Board
The secret to a great cheese board isn't about having a specific, expensive list of items, but rather a good balance of flavors, textures, and colors. Think of it as building a delicious edible landscape.
The Stars: Cheeses
Start your board with the cheese. For a board serving 5-6 people, aim for 3-5 different varieties. The key is to offer a range of flavors and textures.
- Mild & Creamy: A crowd-pleaser like a brie, camembert, or fresh mozzarella. These offer a gentle flavor and luxurious texture.
- Medium & Firm: Think cheddar (sharp, white, or even an 'unexpected' cheddar), gouda, or provolone. These provide more structure and a familiar, comforting taste.
- Strong & Bold: For the adventurous palates! A pungent blue cheese, a tangy goat cheese (especially delightful with cranberries during holidays), or a robust aged parmesan. These add depth and a flavorful punch.
- Pro Tip: Always let your cheeses come to room temperature for about 30-60 minutes before serving. This allows their full flavor and aroma to develop.
Savory Companions: Meats & Charcuterie
Meats add a satisfying, savory element and are perfect for pairing. You can be simple or go gourmet.
- Deli Meats: Sliced turkey, ham, or roast beef are excellent everyday options. Fold them creatively into piles or ribbons for visual interest.
- Cured Meats: Elevate your board with salami, prosciutto, soppressata, or chorizo. Their rich, salty flavors pair beautifully with cheese. Arrange them in neat stacks, rolls, or even a beautiful "salami river."
The Crunch Factor: Crackers & Bread
These are the vehicles for your delicious toppings. Offer a variety of shapes, sizes, and textures.
- Plain Crackers: Water crackers or simple butter crackers won't overpower the cheese flavors.
- Textured Crackers: Seeded crackers, multigrain options, or even artisanal crisps with dried fruits and nuts add interest.
- Bread: Sliced baguette, pita chips, or even mini toasts can be fantastic.
Sweet & Tangy Accents: Fruits & Spreads
These elements bring color, freshness, and often a delightful counterpoint to the richness of the cheese and meat.
- Fresh Fruits: Grapes (especially red and green clusters), berries (raspberries, blueberries, strawberries), apple slices, pear slices, and figs are all excellent choices. Think seasonally for the freshest options.
- Dried Fruits: Apricots, cranberries, dates, and cherries offer concentrated sweetness and chewiness.
- Spreads & Jams: Honey, fig jam, fruit preserves, or a spicy mustard can transform a simple pairing. Small ramekins or bowls are perfect for these.
Texture & Flavor Boosters: Nuts & Olives
Don't underestimate the power of these small additions to fill gaps and add a satisfying crunch or briny kick.
- Nuts: Almonds (especially sweet and spicy varieties), pecans (cinnamon roasted are a treat!), walnuts, pistachios, or even cashews. Offer a mix of plain and flavored.
- Olives: Marinated olives, Kalamata, Castelvetrano, or a mix from your deli section.
The Hidden Gems: Pantry Staples & Garnishes
This is where you can truly make the board your own and use what you have on hand.
- "Snack Foods": Peanut butter pretzels, trail mix, small chocolate squares, or even colorful candies can add a fun, unexpected element.
- Fresh Vegetables: Cherry tomatoes, cucumber slices, or carrot sticks can add freshness and a healthy crunch, especially if your board doubles as a light lunch.
- Garnishes: A few sprigs of fresh rosemary or thyme, or even edible flowers, can elevate the visual appeal dramatically.
Mastering the Art of Assembly: Your Step-by-Step Guide
Once you have your ingredients, the actual process of assembling a cheese board is surprisingly intuitive. The secret, as many seasoned board-makers will tell you, is to "just pile it on there" – aiming for abundance and creating a visually appealing spread.
- Choose Your Canvas: Start with your board or platter. This could be a wooden cutting board, a slate slab, a large ceramic plate, or even a baking sheet lined with parchment paper. Size depends on how many you're serving.
- Anchor with Cheese: Place your cheeses first. Distribute them evenly around the board, leaving space between each for other items. Slice some cheeses, leave others whole with a small knife for guests to cut themselves.
- Arrange Your Meats: Next, add your meats. Fan out slices, fold them into small piles, or create elegant ribbons and folds. Place them near cheeses that would be good pairing partners.
- Surround with Crackers & Bread: Create piles or lines of crackers and bread around the cheeses and meats. Vary the placement and types to make it look abundant and accessible. Don't be afraid to tuck some under other items.
- Fill with Fruits & Spreads: Add your fresh and dried fruits next. Grapes can be left in small bunches, berries scattered. Place small bowls or ramekins of spreads (honey, jams) strategically throughout the board.
- Scatter Nuts & Olives: Fill in any remaining gaps with nuts and olives. These are great for adding texture and visual interest in smaller spaces.
- The Finishing Touch: Add any garnishes like fresh herbs to give it that professional, vibrant look. Place small cheese knives or spreaders near each cheese and spread. Ensure everything is easy to reach and grab.
Remember, the goal is to make the board look generous and inviting. Don't be afraid to let items touch and overlap slightly. This creates that coveted "overflowing abundance" look that is so appealing.
Smart Tips for an Impressive Yet Effortless Cheese Board
Making a show-stopping cheese board doesn't have to be complicated or expensive. A few smart strategies can make all the difference.
Budget-Friendly Brilliance
You truly don't need a gourmet grocery budget to create a fantastic board.
- Shop Your Pantry First: Before heading to the store, check what you already have. Leftover crackers, a handful of nuts, a jar of jam, or some deli meat can be the starting point for a delicious board.
- Embrace Store Brands: Many grocery store brands offer high-quality cheeses and charcuterie at a fraction of the cost of specialty brands.
- Seasonal Produce: Buying fruits and vegetables that are in season is often more economical and ensures peak freshness and flavor.
- Bulk Bins: Nuts and dried fruits are often cheaper when purchased from bulk bins.
Speedy Spreads for Any Occasion
Sometimes you need a fantastic appetizer in a flash. With a few tricks, you can assemble an impressive board in 10-15 minutes or less.
- Keep Staples on Hand: Always have a block of a versatile cheese (like cheddar), a sleeve of crackers, and some dried fruit or nuts in your pantry.
- Minimal Variety, Maximum Impact: For a quick board, focus on 2 cheeses, 1 meat, and 2-3 accompanying items. The abundance comes from piling those few items generously.
- Pre-Washed Produce: Opt for pre-washed berries or grape clusters for instant freshness.
For more tips on rapid assembly, check out our guide on Quick & Easy Cheese Boards: Perfect for Any Occasion.
Customization for Every Taste
The beauty of a cheese board is its adaptability.
- Themed Boards: Create a "Mediterranean board" with hummus, feta, olives, and pita; a "dessert board" with sweet cheeses, fruits, chocolate, and cookies; or a holiday-themed board with festive colors and flavors.
- Dietary Needs: Easily accommodate vegetarians, vegans (with plant-based cheeses and dips), or gluten-free guests by offering appropriate options and clearly labeling them.
- Kid-Friendly Options: For the little ones, include milder cheeses, sliced deli meats, small crackers, and plenty of fresh fruit and kid-favorite snacks like pretzels.
Learning how to make a cheese board is truly a culinary superpower. It's a no-cook solution that offers endless possibilities for creativity, taste exploration, and effortless entertaining. By following these simple steps and tips, you'll be able to create stunning spreads that delight your guests and satisfy your own cravings without breaking the bank or spending hours in the kitchen. So, gather your favorite ingredients, get creative with your arrangement, and enjoy the delicious journey of cheese board making!
